Acrylic nails can give you a polished, long-lasting look – no salon visit required! To do acrylic nails as a beginner, you need the right tools, proper nail prep, and a simple step-by-step method that keeps the process clean and controlled. With some patience and a bit of practice, you can end up with a set that looks surprisingly professional and holds up for weeks.
You’ll start by gathering the essentials, such as acrylic powder, liquid monomer, nail tips, glue, files, and a brush. Prepping your nails is key for a strong bond and long wear. If you rush or skip prep, you’ll probably deal with lifting and chipping. So, don’t breeze past this part.
Once your nails are ready, applying acrylic is mostly a matter of placing, shaping, and smoothing the product. Good technique helps you dodge lumps, weird edges, and weak spots. By the end, you’ll have a handle on shaping, finishing, and keeping your nails looking fresh until it’s time for a fill.
[amazon bestseller=”Acrylic Nail Tool Kit” items=”1″]
Essential Tools and Materials
Acrylic Nail Kit Components
A basic acrylic nail kit usually includes acrylic powder, acrylic liquid (monomer), a dappen dish, and an acrylic brush. These are your core items for building and shaping the nails.
Powder and liquid combine to form the acrylic bead you’ll sculpt onto your nail. Go for a fine, consistent powder to avoid lumpy results.
A good brush – often a Kolinsky sable brush – holds liquid well and shapes beads smoothly. A glass dappen dish is best since it’s easy to clean and stands up to chemicals.
Some kits throw in nail files, buffer blocks, and nail glue. Not every kit has these, but they’re handy when you’re starting out.
Choosing the Right Monomer and Acrylic Liquid
Monomer quality makes a difference in how easy acrylic is to work with and how long it lasts. Always look for a professional-grade liquid that’s MMA-free (methyl methacrylate isn’t good for natural nails).
Setting speeds vary. If you’re new, a slower-setting monomer gives you extra time to shape before things harden. Faster-setting ones are better if you’re quick and confident.
If you’re working in a small space, low-odor liquid is a lifesaver. Stick with powder and liquid from the same brand for consistent results.
Keep your monomer in a sealed container, away from heat and sunlight, so it doesn’t degrade. That way, it stays reliable for longer.
Selecting Artificial Nail Tips
Artificial tips come in shapes like square, almond, and stiletto, plus all kinds of lengths. Pick a style that fits your vibe and sits comfortably on your natural nail, but don’t force it.
The tip should hug the nail edge without gaps. Too wide or too narrow? You’ll end up with lifting or discomfort.
Good tips are made from ABS plastic, which is tough but not brittle. Keep a variety of sizes around so you can match each nail, not just guess.
Use a strong, quick-drying glue to attach the tip, then blend it into the natural nail for a smooth base before you lay down acrylic.
Nail Preparation Basics
Getting your fingernails ready before applying acrylics helps the product bond better and last longer. A clean, smooth surface cuts down on lifting, keeps debris out, and makes your manicure look tidy for weeks. Small things like proper cleaning, shaping, and using the right prep products really do make a difference.
Cleaning and Sanitizing Fingernails
Wash your hands with warm water and mild antibacterial soap. That gets rid of dirt, oil, and bacteria. Dry your hands completely, as any leftover moisture under the acrylic is a recipe for problems.
Sanitize your hands and nails with an alcohol-based sanitizer. Wipe each nail with a lint-free pad soaked in 70% isopropyl alcohol to get rid of any lingering oils.
If you have old polish or product, remove it gently. Use non-acetone remover for regular polish and proper soaking for gels or acrylics. Don’t scrape too hard or you’ll damage your nail plate.
Cuticle Care and Nail Shaping
Push your cuticles back with a cuticle pusher – gently, or you’ll risk hurting the skin or nail matrix. Any cuticle left on the nail can cause lifting later.
If there’s extra cuticle, use remover or nippers to snip just the dead tissue. Cutting live skin is a no-go; it can cause irritation or infection.
Trim your nails to your preferred length, then shape them with a file – square, round, squoval, whatever you like.
Try to keep the shape consistent across all your nails so your acrylics apply evenly and look balanced.
Applying Nail Prep Products
After shaping, lightly buff the nail surface with a fine-grit buffer. This gets rid of shine and gives the acrylic something to grab onto. Don’t overdo it, as over-buffing can thin your nails.
Brush away dust with a clean nail brush. Wipe the nail with a lint-free pad and isopropyl alcohol to clear away any residue.
Apply a nail dehydrator to remove leftover oils. Then use a thin layer of acid-free primer, focusing on the natural nail only. This helps the acrylic stick and keeps lifting at bay.
If you’re using nail tips or forms, attach them after priming for the best fit and hold.
Applying Acrylic Nails: Step-by-Step Process
You’ll be working with nail tips, acrylic liquid, and powder to create a solid nail enhancement that looks smooth and even. Each step is about getting a snug fit, mixing the right monomer-to-powder ratio, building the shape, and smoothing everything out for a clean finish.
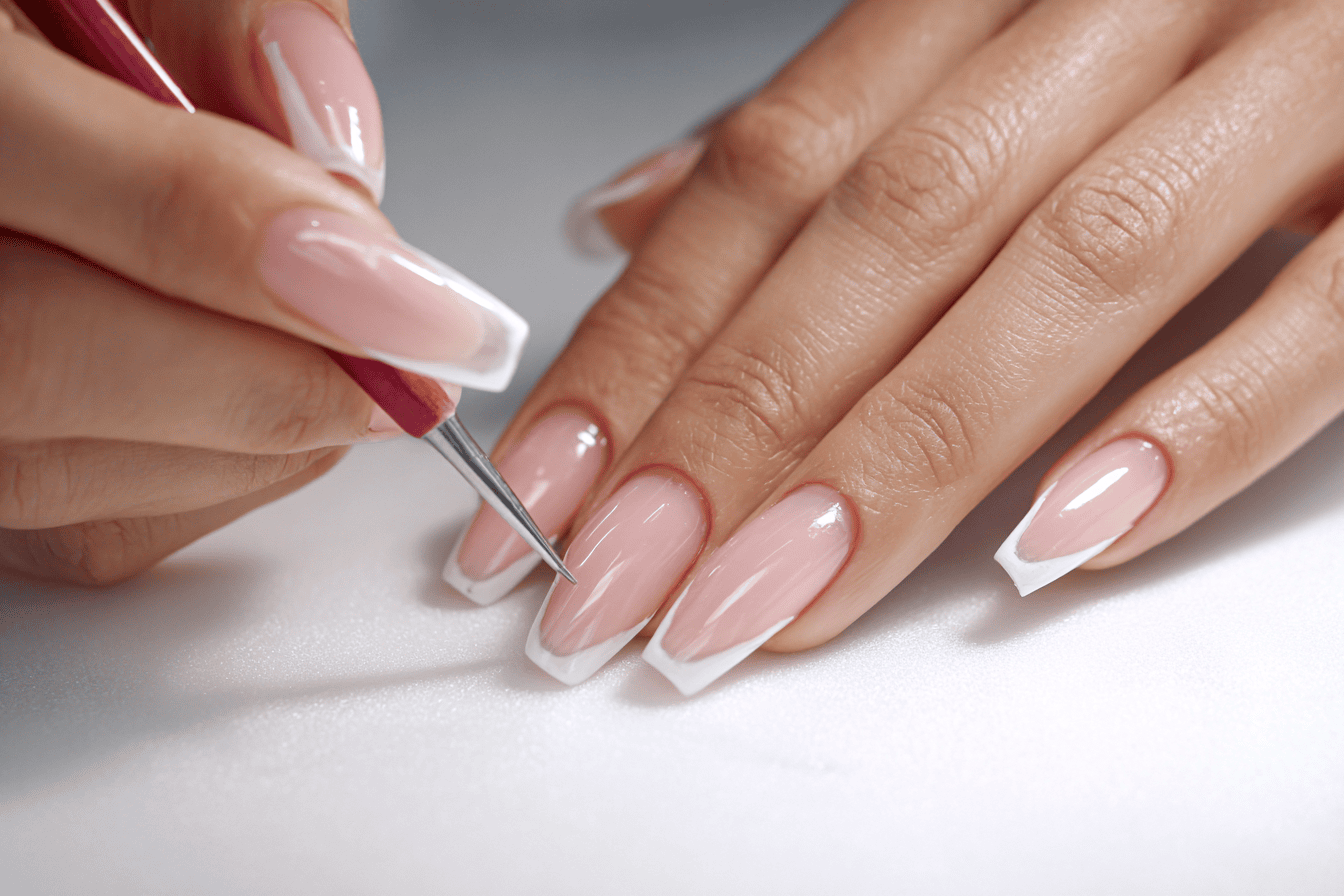
Fitting and Attaching Nail Tips
Pick nail tips that match the width of your natural nails. If one’s a little too wide, file the sides until it fits edge to edge, but don’t let it overlap your skin.
Put a small bead of glue across the tip’s well. Press it onto your nail so the seam sits about halfway down your nail plate. Hold it for 5–10 seconds while the glue sets.
Trim the tips to your preferred length with acrylic nail clippers. Shape the edges with a file to match your style – square, almond, round, whatever you’re into. Go easy on the glue or it’ll seep out and cause lifting.
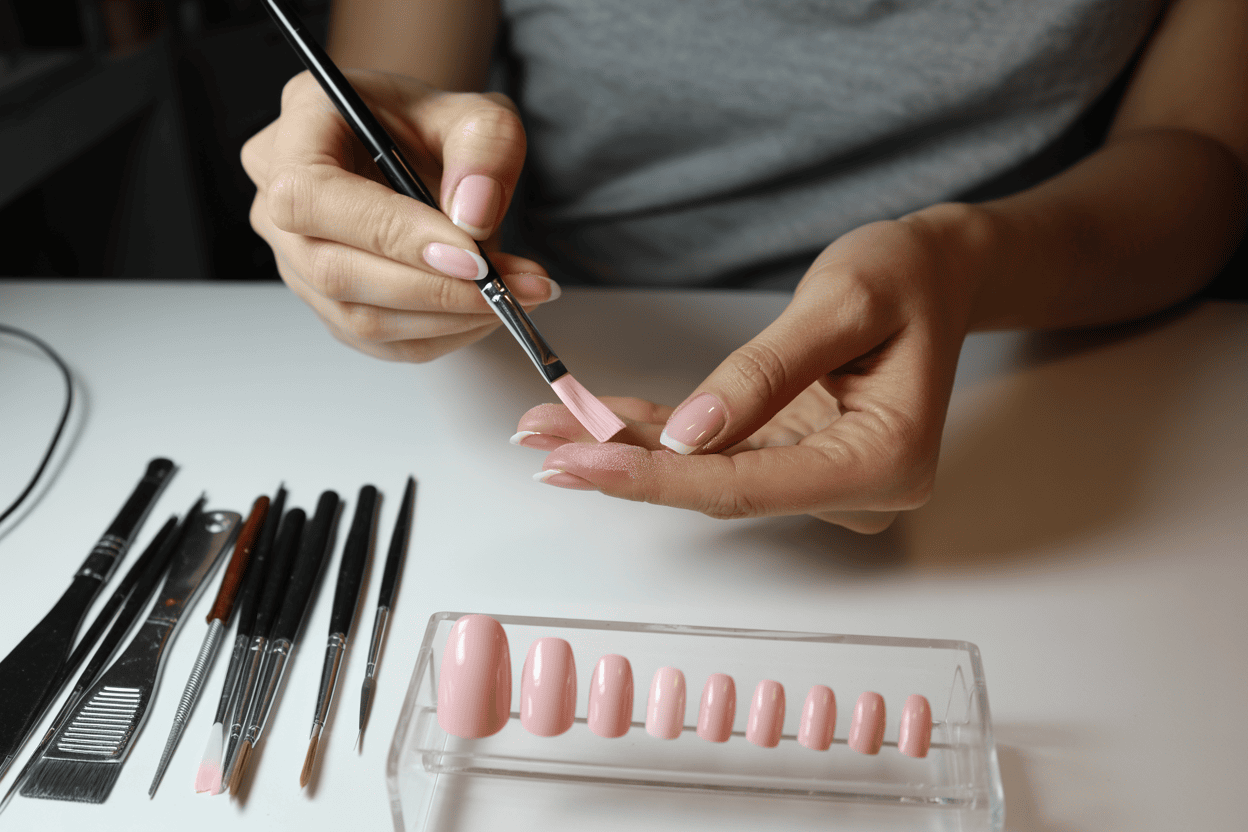
Mixing Acrylic Liquid and Powder
Pour a bit of acrylic liquid (monomer) into your dappen dish. Keep the powder separate to avoid mess.
Dip your brush into the liquid, then press it against the side to get rid of excess. Lightly touch the brush to the powder and let a small, workable bead form at the tip.
The bead should look smooth and a little glossy, but not runny, not dry. If it’s too wet, it’ll flood the nail; too dry and it won’t stick. And yeah, work somewhere with good airflow, as monomer fumes are no joke.
Sculpting and Shaping the Nail Enhancement
Place the first bead at the seam where the tip meets your natural nail. Flatten it gently and brush toward the tip to blend the join.
Add another bead closer to your cuticle, leaving a tiny gap so the acrylic doesn’t touch your skin. Use light, controlled strokes to pull the product toward the free edge, aiming for a smooth, even surface.
If you’re new to this, smaller beads are easier to manage and mean less filing later. Try to build a nice apex (that gentle curve) for strength without making the nail look chunky.
Finishing and Buffing Techniques
Once the acrylic hardens, listen for a slight clicking sound when you tap it, then start shaping with a 180-grit file. Refine the sides and free edge so everything matches up.
Switch to a 240-grit buffer to smooth out scratches from the coarse file. For a really polished look, move up to finer grits like 1000 and 4000. You can get a glossy finish even before top coat if you want.
Brush away dust before you apply polish or a clear sealant. Otherwise, particles can stick and mess up your final look.
Aftercare and Maintenance

Keeping acrylic nails looking good and lasting longer is really about protecting them from damage, catching issues early, and removing them gently when it’s time. A few tweaks to your daily routine and regular upkeep actually go a long way toward keeping your nails in shape.
Protecting Acrylic Nails
Water, chemicals, and rough handling can all weaken acrylic nails. Wearing rubber gloves for dishes or cleaning helps prevent lifting and brittleness.
Don’t use your fingernails as tools to open cans or scrape stuff, tempting as it is. That kind of stress leads to cracks or breaks.
Moisturize your cuticles with cuticle oil to keep the skin healthy and help prevent dryness that can cause lifting.
If you’re swimming, rinse and dry your hands well after. Too much water exposure can loosen the acrylic’s bond with your natural nail.
A clear top coat every few days adds protection and helps keep that shiny look going.
Filling and Repairing Artificial Nails
Acrylic nails grow out alongside your natural nails, which leaves a bit of a gap near the cuticle. Getting a fill every couple of weeks – maybe every 2 or 3 – really helps keep them looking decent and stops them from lifting up at the edges.
When you go in for a fill, the tech preps the grown-out part and adds fresh acrylic so it blends in with the rest. If you let the gap go too long, the acrylic can start to lift, and honestly, that just invites moisture (and sometimes fungus—nobody wants that) underneath.
If you chip or crack a nail, it’s best to fix it sooner rather than later. Minor breaks can usually be patched up with a dab of nail glue or a little acrylic powder to hold you over until your next appointment.
Try not to peel or yank at damaged acrylic, it’s tempting, but it can really mess up your natural nail underneath. For bigger breaks, it’s almost always better to let a pro handle the repair.
Safe Removal Practices
When it’s time to take off acrylic nails, soaking in acetone tends to work best. You can grab a small bowl or just wrap each nail in acetone-soaked cotton and foil, then wait it out for about 20–30 minutes.
Once the acrylic softens up, gently nudge it off with an orangewood stick. Don’t rush it or pry; that’s how you end up peeling layers off your natural nails, and nobody wants that.
If messing with chemicals isn’t your thing, or you’re just not sure, a nail tech can do the removal for you. They’ll usually stick to the same soaking method anyway.
Afterward, maybe let your nails breathe a bit before jumping into another set. A little nail strengthener or some nourishing oil goes a long way in getting them back to normal.