Nail art can be a fun and creative way to express yourself, even if you’re just starting out. Whether you want something simple for everyday wear or a bit more flair for a special occasion, there are plenty of designs that are easy to replicate. This article will guide you through 30 easy nail designs that are perfect for beginners.
With just a few tools and a bit of practice, you’ll be able to create beautiful nail art right at home. From chic minimalistic designs to playful patterns, you’ll discover options that suit every taste. There’s something satisfying about showing off your own handiwork, and these designs can help you build confidence in your nail art skills.
[amazon bestseller=”Glamnetic Press On Nails” items=”1″]
1) Polka Dots

Polka dots are a classic choice for nail art. They’re simple, fun, and perfect for beginners.
You can create polka dots using various tools like dotting tools, brushes, or even a toothpick. Pick your favorite colors to make it pop.
Start with a base coat. After it dries, use your chosen tool to add dots in different sizes. Feel free to mix colors for a playful look.
This design works great on any nail shape! Just remember to seal with a top coat to keep your dots looking fresh. Enjoy getting creative!
2) French Tips

French tips are a classic choice that never goes out of style. They’re simple yet elegant and great for beginners.
You can easily achieve this look at home. Start with a neutral base coat, then apply white polish to the tips of your nails.
For added flair, you can experiment with different colors or even use nail strips for precision. Keep it clean and let the design shine.
It’s a quick and chic way to elevate your manicure. Enjoy the process and customize it to match your vibe!
3) Glitter Accent

A glitter accent can add a fun pop to your nails without being too complicated. Choose a base color that you love and apply it to all your nails. Once dry, pick one or two nails on each hand to feature the glitter.
Use some glitter polish or loose glitter and apply it to the accent nails. You can create a gradient effect or just cover the tips for a chic look. A dotting tool helps if you want to play with patterns.
Don’t forget to seal everything with a clear topcoat. This will keep your design looking fresh and shiny. Plus, it helps prevent chipping. Enjoy your sparkly nails!
4) Floral Stamps

Floral stamps are a fun way to create beautiful designs without the hassle of freehand painting. They allow you to easily add intricate flower patterns to your nails.
You simply choose a stamp design, apply nail polish, and then transfer it onto your nails. This method is perfect for beginners looking to enhance their nail art skills.
You can find a variety of floral stamping plates featuring different designs, from delicate blossoms to bold florals. These options make it simple to match your mood or outfit.
With a few practice runs, you’ll be able to nail down the technique and impress everyone with your manicured look.
5) Striped Design

Striped designs are a classic and fun choice for your nails. You can play around with colors and widths to get a look that fits your personality.
First, start with a base coat to protect your nails. Next, choose two or more polish colors. Use tape or a striping brush to create straight lines.
You can mix up the colors for a bold look or stick to subtle shades for something more understated. Experimenting with diagonal lines adds an interesting twist.
Finish with a clear top coat to seal your design and provide shine. Striped nails are easy to refresh whenever you want.
6) Geometric Shapes

Geometric shapes make nail art fun and easy, perfect for beginners. You can create various designs using simple patterns like lines, triangles, and dots.
Start with a base color and use nail tape to make sharp edges. This helps to keep lines clean and precise.
Experiment with different shapes and color combinations. Using contrasting colors can make your designs pop.
Check out some tutorials to see how to create specific looks. A lot of resources focus on geometric patterns, which are straightforward and rewarding.
7) Ombré Nails

Ombré nails blend different colors for a stunning gradient effect. It’s perfect for those starting out because you can keep it simple and still look professional.
Choose three shades from the same color family, moving from light to dark. Use a makeup sponge to softly blend the colors on your nails.
To start, paint half of your nails with the base color. Then, apply the other shades to the sponge and dab it on the tips, merging the hues for a seamless swipe. Practice will help you nail the technique!
8) Animal Print

Animal print nail designs are fun and trendy. You can create various styles like zebra, leopard, or cow prints easily at home.
Start with a simple base coat. Use a contrasting color to add spots or stripes using your nail polish brush. No special tools are needed!
For a bold look, try neon colors. They really make the animal print pop.
These designs can match any outfit, making them versatile for any occasion.
9) Sunset Gradient

Sunset gradient nails are a fun way to bring some color into your manicure. This style mimics the beautiful transition of colors during a sunset, usually blending oranges, pinks, and yellows.
Start with a light base coat. Apply your chosen colors with a sponge to create the gradient effect. Make sure to blend them well for a smooth transition.
You can also add shimmer or glitter on top for a bit of sparkle. A quick top coat will seal everything in and help the design last.
This look works on both short and long nails. It’s simple, stylish, and perfect for any occasion.
10) Metallic Finish

Metallic finishes add a bold twist to your nail designs. They shine and reflect light, making your nails pop in any setting. You can choose from chrome, gold, silver, or even colorful metallics for a unique touch.
For a simple look, a solid metallic color can create an eye-catching effect. Just apply a base coat, then your chosen metallic polish, and finish with a clear top coat for extra shine.
If you want to experiment, try mixing metallics. Create half-and-half designs or use striping tape to section off parts of your nails. Each nail can be a mini work of art.
Applying metallic polish is usually straightforward, making it beginner-friendly. Just be sure to let each layer dry properly. With metallic designs, your nails can become a stylish accessory that stands out.
11) Galaxy Nails

Galaxy nails let you get creative with colors and designs that mimic the night sky. Perfect for beginners, they can be accomplished with just a bit of practice.
Start with a dark base coat, like black or deep blue. Once your base is dry, use a makeup sponge to dab on shades of purple, blue, and white. This method gives a blended look and adds depth.
Don’t forget to add some sparkle. A bit of glitter or shimmery polish can enhance the cosmic feel. Finish with a top coat to seal your design and give it a glossy finish.
12) Fruit Motifs

Fruit motifs are a fun and colorful choice for nail art. They add a fresh vibe to your look, especially in summer. You can choose from different fruits, like cherries, strawberries, or lemons.
Easy designs include painting small fruit shapes on accent nails. You might opt for a full fruit theme or just add a few fruity touches to a classic manicure.
For instance, try an orange polish with a slice detail on one or two nails. Pair it with a contrasting color for the rest.
These designs are perfect for beginners. They allow for creativity while keeping things simple. Enjoy experimenting with colors and shapes that fit your style!
13) Camo Print

Camo print on your nails is a fun trend. It offers a unique twist to traditional nail art. You can choose from a variety of colors like classic greens or bold pinks for a playful vibe.
To create this design, start with a base color of your choice. Then, use a sponge to dab on different shades for that camo effect. If you’re feeling creative, add some glitter or accents to make your nails pop.
Camo designs work well with various nail shapes. Whether you prefer oval or stiletto, the print can look great. Try to keep your patterns random for a more authentic look.
This design is perfect if you want something stylish yet easy to do. It’s a great way to experiment with colors without being overly complicated. Think of it as a fun way to express your personality!
14) Cloud Design

Cloud designs are perfect for adding a whimsical touch to your nails. You can keep things simple with a sheer polish and white nail art to create soft, fluffy clouds.
For a fun twist, try contrasting colors to depict day and night. Yellow and blue on one hand can represent the bright sky, while darker hues on the other mimic the night.
Creating this design doesn’t take long, making it ideal for beginners. Just aim for a light base and add your cloud details using a dotting tool or a thin brush.
With a little practice, you’ll have those dreamy nails ready in no time!
15) Rainbow Stripes
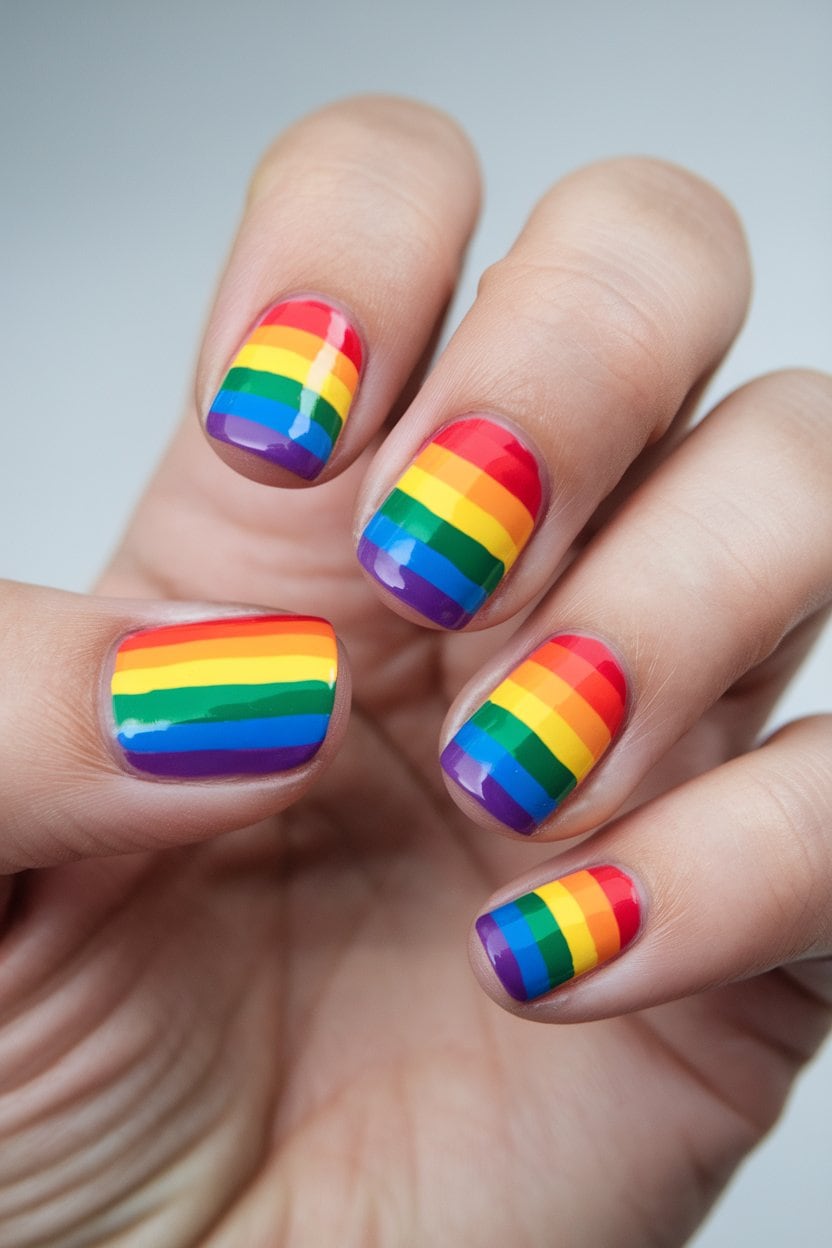
Rainbow stripes are a fun and colorful way to add flair to your nails. You can easily create this look with a few bold polish colors. Choose shades that pop and apply them in even stripes for a playful vibe.
Start with a base coat to protect your nails. Using a striping brush or tape, apply each color next to the other, ensuring they’re neat. Don’t stress about perfection; the charm lies in its lively, artistic look.
Experiment with different patterns, like thin or thick stripes, or even a gradient effect. Adding a glossy top coat can give your nails a beautiful shine and help the colors last longer.
This design is perfect for any occasion or just when you want to brighten your day. Enjoy the process and let your creativity shine through.
16) Daisy Print

Daisy print is a charming choice for your nails. It’s not too complicated, making it perfect for beginners.
Start by choosing a base color. Soft pastels or classic white work well, but feel free to get creative.
For the daisies, you’ll need a thin brush or a dotting tool. Dots for petals and a small dot for the center create a cute flower look.
You can mix and match colors, too. A yellow center with white petals or pink flowers can brighten up your nails. It’s all about having fun with it!
17) Starry Night

Creating a starry night design is fun and simple. Start with a dark base color, like navy or black, to mimic the night sky.
After the base dries, use a dotting tool or a thin brush for the stars. White or yellow polish works well for this.
Feel free to mix up the sizes of the dots for a more dynamic look.
Adding a glitter top coat can give your nails that shimmering effect, making them pop.
This design is perfect for any occasion and adds a celestial touch to your nails!
18) Zebra Stripes

Zebra stripes bring a fun and bold flair to your nail designs. This pattern is easy to create, making it perfect for beginners. Start with a white base coat for a fresh look.
Once that’s dry, take a black nail polish and a fine brush. You can either freehand the stripes or use a striping tool for more precision. Remember to vary the widths of the lines for a more natural look.
Adding a little glitter can elevate the design even more. For a simple twist, try half-and-half patterns with black and white sections. This design is playful and unique, letting your creativity shine.
19) Holographic Look

Holographic nails offer a stunning, eye-catching effect. They change color based on light and movement, creating a unique look each time you catch a glimpse.
Getting this look is easier than you might think. You can apply holographic powder over a base coat to achieve that shimmering effect.
Choosing the right holographic pigment is essential for your desired outcome. A good quality powder will reflect a broad spectrum of colors.
For a simple application, consider using nail decals. These can save time and still give you that flashy holographic vibe.
Experiment with different base colors to find what suits you best. Blues, purples, and even neutrals can serve as great backgrounds for holographic effects.
20) Pastel Swirl

Pastel swirl nails are trendy and fun. They’re perfect for beginners who want to try something artsy without too much fuss.
You just need a few pastel colors and a steady hand. Start with a base coat, then apply your favorite pastel shades in swirling patterns.
Mix and match colors like soft pinks, blues, and purples for a delightful look. You can use a thin brush or even a dotting tool to create the swirls.
Finish off with a top coat for extra shine and protection. Pastel swirl nails can brighten your look, making them a great choice for any occasion.
21) Tropical Leaves

Tropical leaf designs bring a refreshing look to your nails. They’re perfect for anyone wanting to add a bit of nature-inspired flair.
Start with a base coat using a light or neutral color. This will help the leaves stand out.
Using nail art brushes, create leaf shapes with green polish. You can mix various shades of green for depth. Adding small details in white or gold can take the design up a notch.
These designs are great for any occasion and can be done quickly. Plus, they’re simple enough for beginners to master without stress. Enjoy your nail art journey!
22) Watermelon Slices

Watermelon slice nails are a fun and colorful option for your manicure. Start with a pink base to represent the fruit’s flesh.
Next, add a green tip for the rind. Use small black dots as seeds to finish the look.
This design is simple yet playful, perfect for summer vibes. Enjoy trying out different styles and variations that reflect your personality.
23) Cactus Theme

Cactus-themed nails are a fun way to express your personality. You can go for minimalist designs or opt for colorful, detailed art.
Try painting small cacti on a base color like white or pastel. This keeps the look fresh and stylish.
For a bolder approach, use neon colors. Think bright greens and pinks against a dark background. It really makes the design pop.
Adding glitter polish can give your nails extra flair. Use stencils for clean cactus shapes and a bit of sparkle.
Don’t hesitate to mix and match different cactus styles. The diversity in designs allows for creative expression.
24) Minimalist Lines

Minimalist lines are a fun way to express your creativity without too much fuss. You can create simple designs using thin lines in various colors. A great idea is to alternate between solid colors and minimalist lines on different nails.
Try a half French tip with a single line extending from the tip across the nail for a chic look. It gives that trendy vibe with minimal effort.
Using colors like gold or silver on a neutral base can really make your nails pop. Experiment with the thickness of the lines for a unique touch. Keeping it simple yet stylish is key.
25) Palm Tree Design

Creating a palm tree nail design is simple and fun. You’ll love how easy it is to achieve a beachy vibe right on your fingertips.
Start with a pastel base color like mint green or soft lilac. These shades work great for a light, summery look.
Once the base is dry, use a thin nail brush or a toothpick to paint palm trees. Dark greens or blacks contrast nicely with lighter backgrounds.
Adding small details like sunset colors behind the trees can give your design a little extra flair. Enjoy practicing this design for a fresh, tropical style!